A Pre-save is a free music tool that allows your fans to save your track before its release date. On release day, your music will be placed in their library, ready for them to start streaming.
Above you can see our Pre-save example. It’s important to note, this isn’t made up of correct information. The music used has already launched and therefore isn’t a real Pre-save. However, the concept is still the same because clicking on the save icons will save the track to your streaming platform. You can then listen to it straight away as it’s live.
We made our Pre-save this way due to wanting to show the entire process in one, which isn’t possible with a track that hasn’t yet gone live because you cannot show the saving process until it has been released. When it comes to your Pre-save, you will be adding store links to a track that hasn’t yet been published.
What is a Pre-save?
We have covered this topic a lot so we won’t go too in-depth, but, for those who haven’t yet heard about Pre-saves, we will briefly explain. A Pre-save is a free music marketing tool. They allow your fans to save your tracks ahead of release day. On the day your music hits streaming stores, it will be saved straight into their library. Meaning, it’s easier to access.
You can add all of your release metadata to your Pre-save. From your artist name, to your artwork and even your social media accounts. They’re a promotional tool, allowing you to market your music before it is available. Drive the hype ahead of release day, and give your fans a glimpse into what they can expect.
How to create a Pre-save
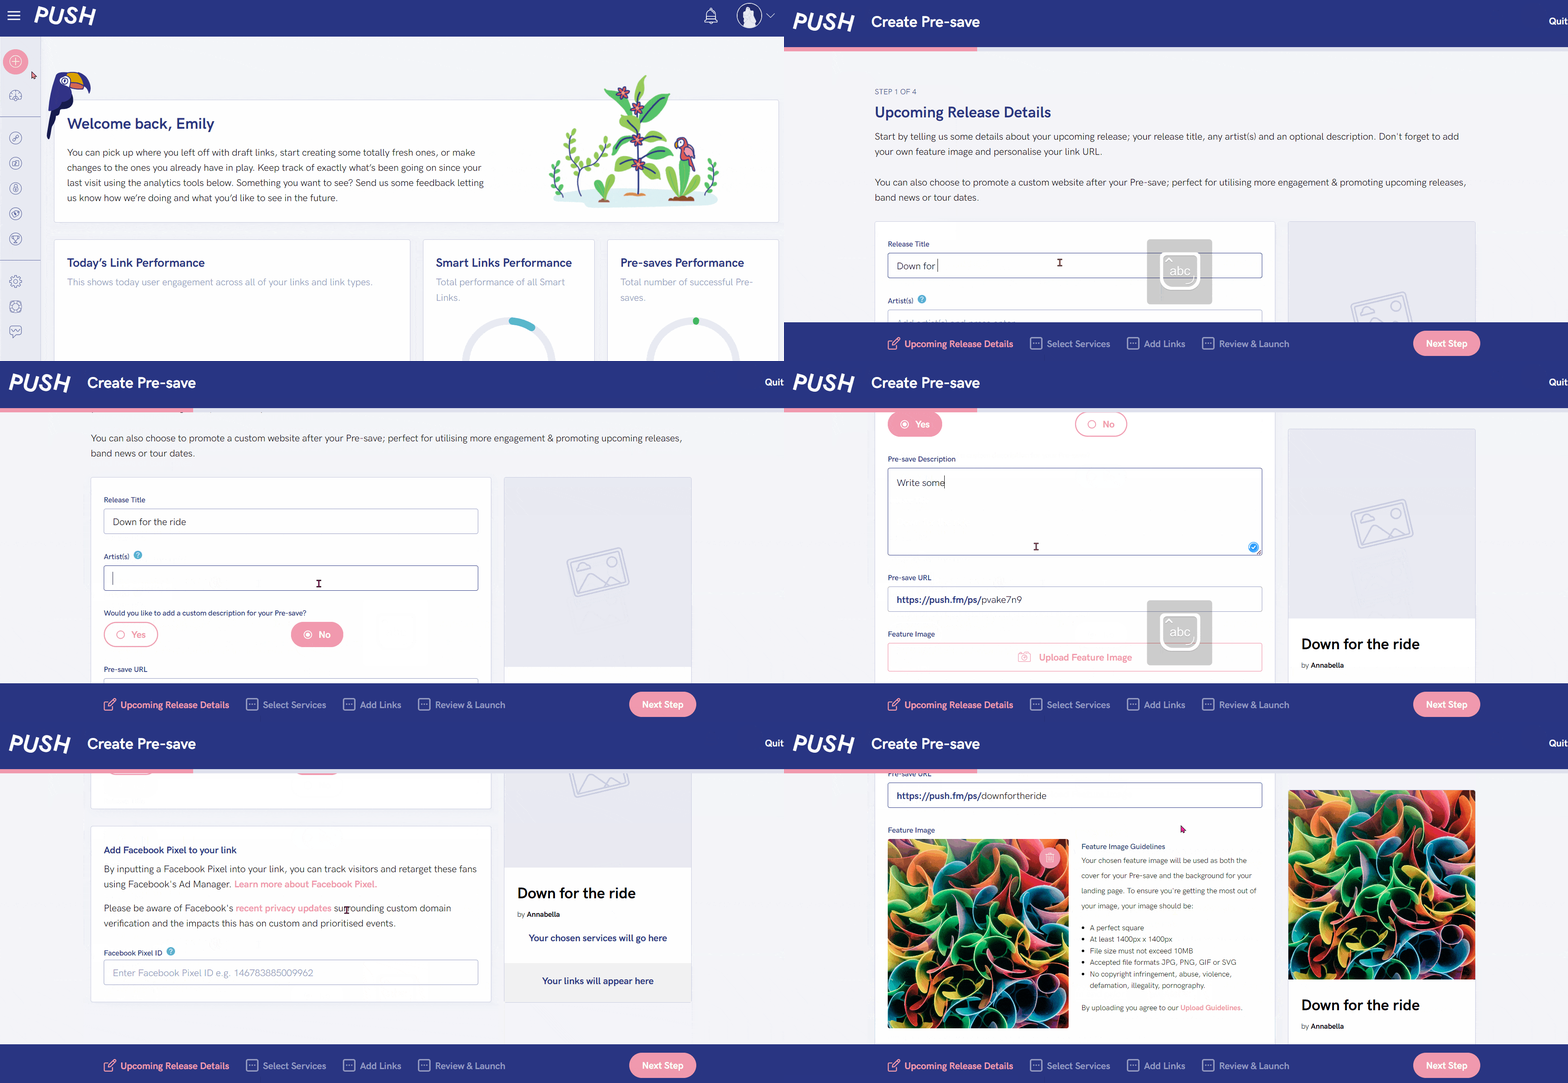
A Pre-save is a really simple tool. You can create yours in just minutes. Anyone can create one and when we say they’re free, we’re not lying. They’re free for anyone to access. All you need to do is first sign up to PUSH.fm, and from there you can get started. Ensure you have access to your streaming store links first, which, can be accessed through your music distributor.
Upcoming release details
First, head to the plus icon in the top-left corner. From the drop-down menu, select Pre-save. You’ll be taken to the initial creation page.
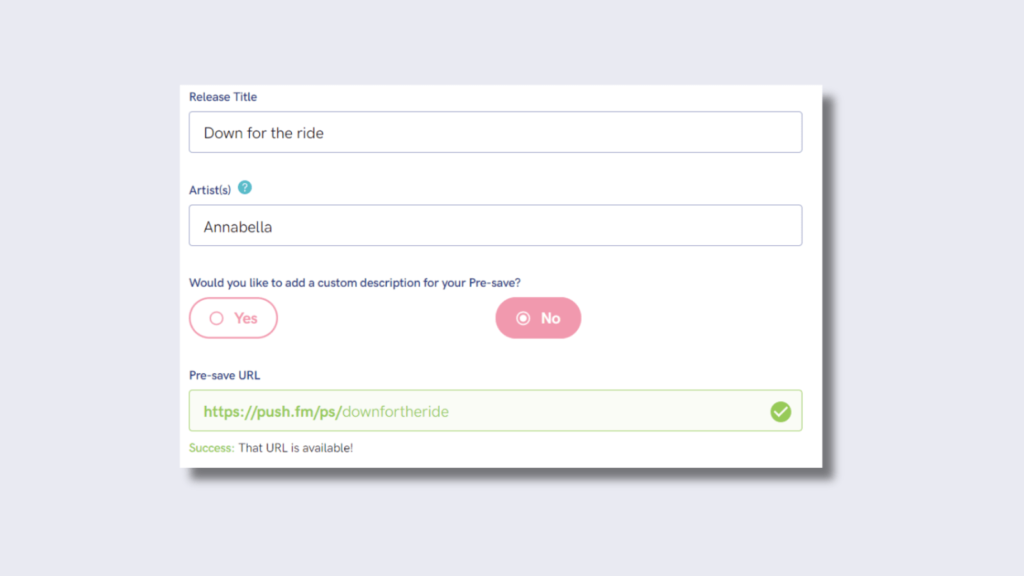
Add in your release title, artist name and change your URL. Your URL should be something that represents you/your music. We’d recommend the track title.
You can even add a custom description to your Pre-save. This will appear underneath the artwork. It’s where you can say a little something about the music.
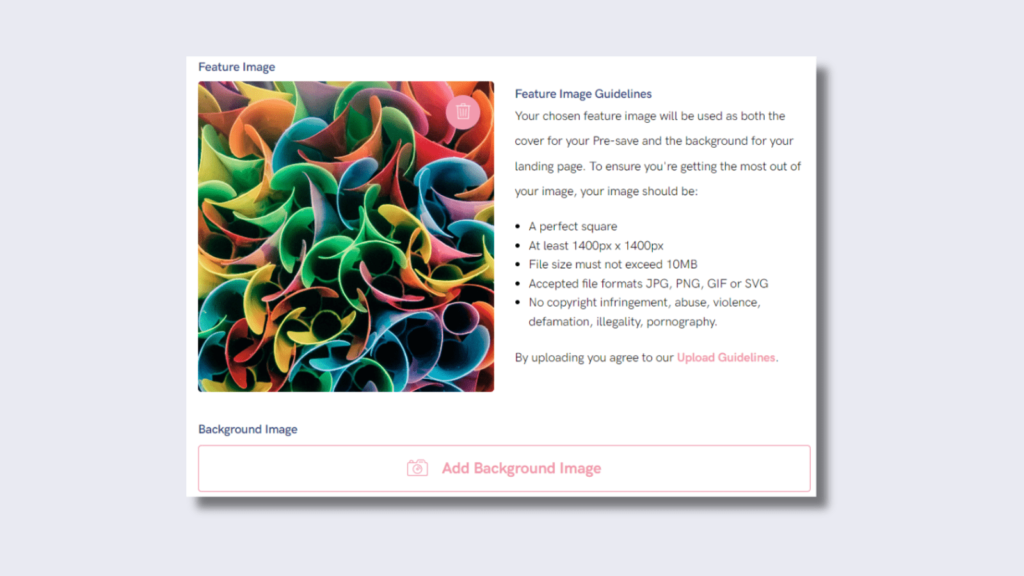
On the same page, you’ll be required to add a Feature Image. This is normally the same artwork as your release for consistency, but, it’s your choice.
If you want to add an artist image instead, you can. It’s up to you what Feature Image you choose. You can also add a Background Image, if you’ve upgraded your account.
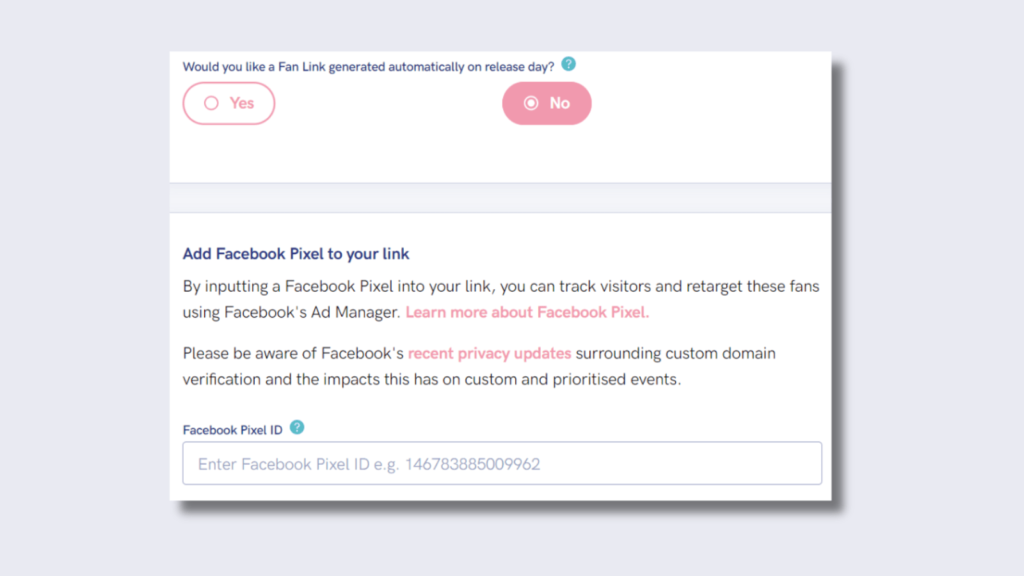
Finally, on the same page, is where you can decide on an automatic Fan Link. If you click yes, our system will create a Fan Link for you on release day.
You won’t need to do anything. All your information, including all stores where your music appears, will be linked ready for your fans to interact with.
On release day, you can go in and edit any details, including removing stores if you wish. This is where you can add Facebook Pixel on this page too.
Select services
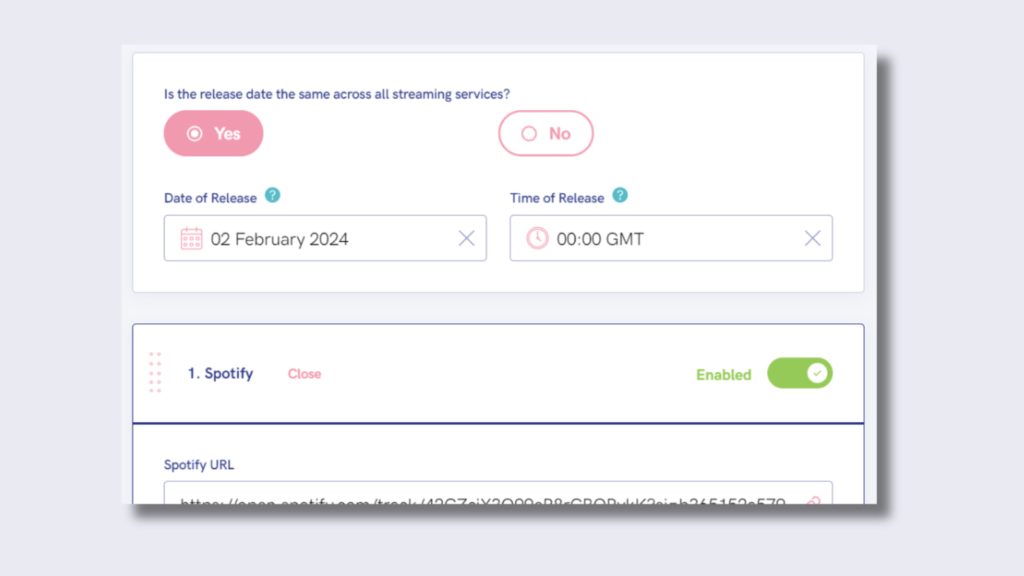
Heading to the next page is where you can add your links. This page is really important because if you input your links wrong, they won’t work.
Our system will flag up any links that don’t seem correct, but if you input a link to another artist’s track by mistake, it won’t notice. So, ensure you have the right links.
You can set your release date here, providing your music hits stores on the same day. Add the date and time. Then start inputting your streaming links.
Add links
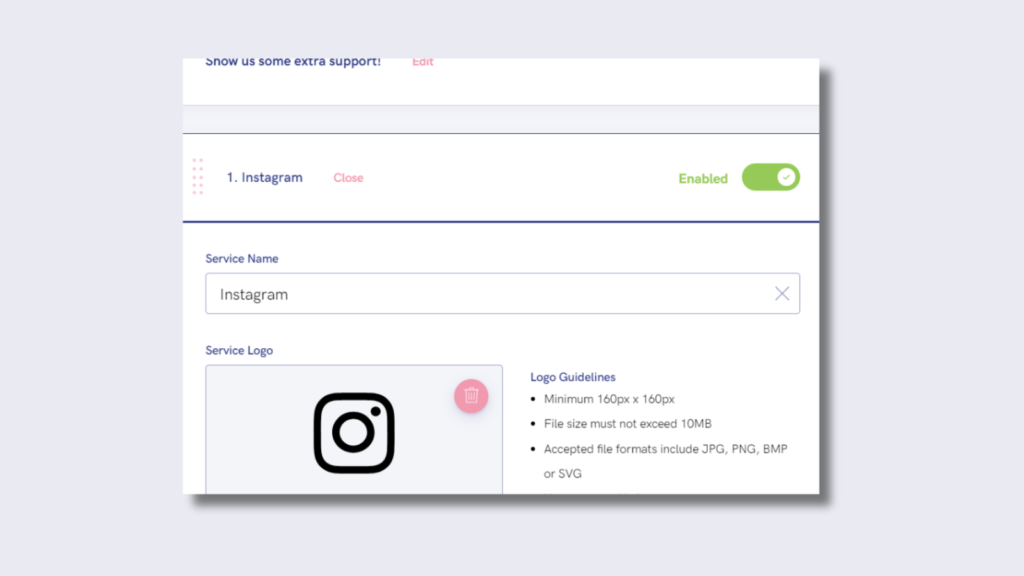
Note, you can only add Deezer, Spotify and Apple Music as these are the three stores that allow Pre-saves. Once you have done this, you can add any extras.
This is where you can include all your social media profiles. They’ll display at the bottom of your Pre-save, providing your fans with other ways to support you.
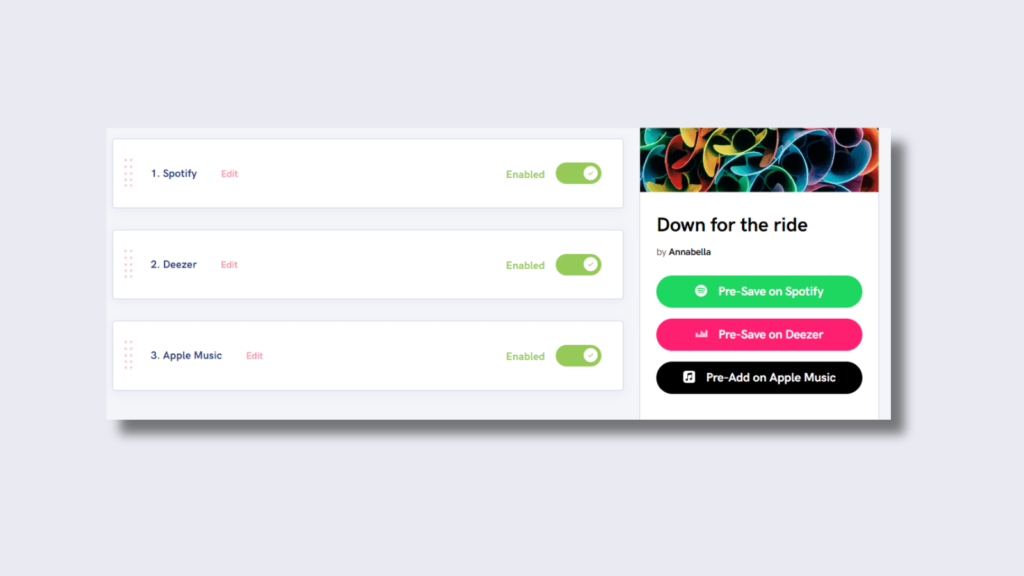
Use the toggles to turn stores off and on. You can view a preview of your Pre-save on the right-hand side. So, you’ll know whether you’re happy with how it looks.
By clicking on the left of the store, where the grey dotted lines are, you can drag and rearrange your stores. If there’s one you want to display first, you can choose.
When you’re happy with your link, it’s time to launch it. This is the final stage of creation. You’ll be directed back to your PUSH.fm account. Within your Pre-save section, you’ll see your new link. Click on it and try it out. This is where the fun begins because now it’s marketing time. Take your link and share it everywhere. The more people who see it, the more saves!


