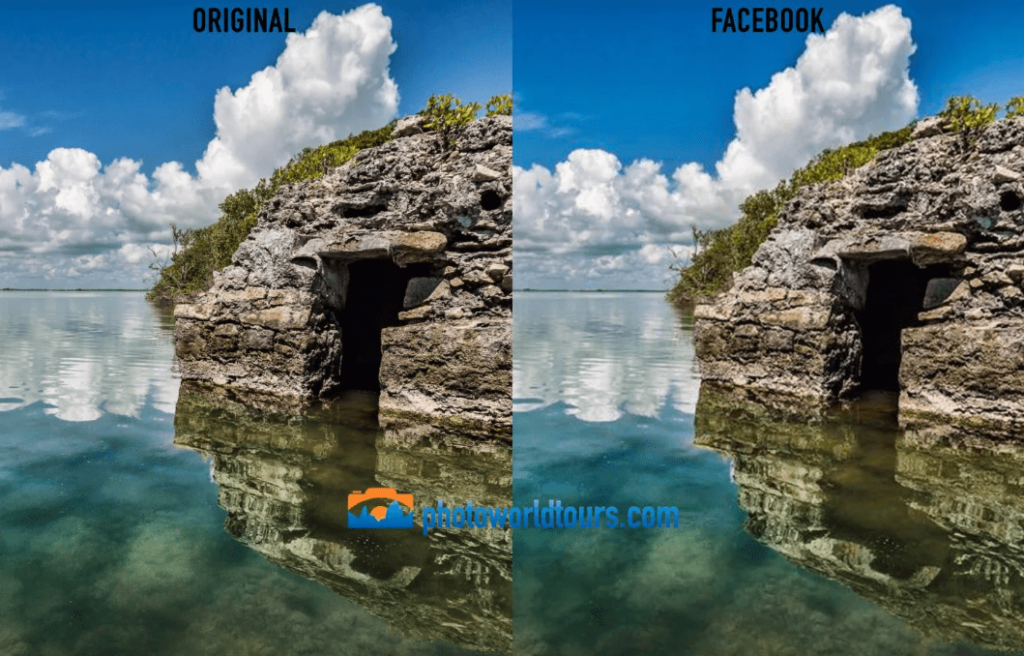
As soon as you upload an image to Facebook, you’ll notice the image quality drops significantly. While at a passing glance the image may still look in focus, it has lost a lot of sharpness it once had. Why is this, and how can you stop it?
When it comes to snapshots from your daily life, the quality might not be too much of an issue. After all, Facebook’s quality isn’t particularly bad, it’s just not as sharp as the original image. Ever. Many may not notice it, because their photos might just be candids of their hobbies or weekend plans. For a quick photo it doesn’t matter too much.
However, those who spend hours photographing as a hobby or career will be able to tell. Uploading your best work to Facebook can be pretty disheartening as the image won’t be as clear as it was when you first shot it. While the likes will still pour in, it won’t be the best representation of what you have to offer. A slightly lower resolution image.
Why does Facebook lower image quality?
Facebook is a brilliant tool for photo sharing. You can upload and share your images within minutes of taking them. Spreading them to your loved ones, letting them see an insight into your daily life. However, if you’re someone like a wedding photographer, uploading to Facebook can be irritating because the quality is lacking.
The reason Facebook reduces quality of images is to load their webpages quicker. No one wants to sit around and wait for pages to load. Often people will get frustrated and leave the page before seeing the end result. However, if a page loads quickly, they’ll stick around. So, for Facebook, their main focus is speed over quality.
They reduce photo quality for everyone. There are so many users on Facebook that reducing the resolution of every image will speed the site up dramatically. All images are compressed. Facebook support photos that are 720px, 960px, or 2048px on the longest edge. Anything less than this will appear visually distorted as the quality will be far too poor.
How to reduce image file size for Facebook
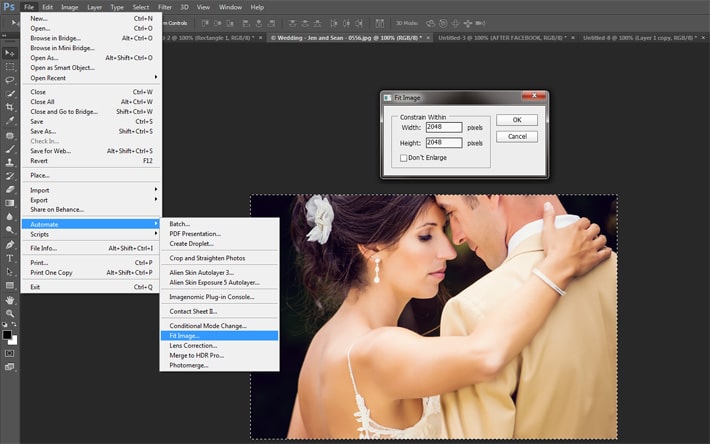
Before uploading a photo to Facebook, you want to ensure your image is 2048px on its longest size. No less. Facebook then won’t reduce the dimensions of your image which means there is less compression needed, so your image won’t appear distorted. It will stay sharp. There are several ways you can downsize your image before you upload.
Any photo editing software will allow you to alter the longest size. You’ll need to ensure you view your image at 100% within the editing software, otherwise it might appear distorted when you finally see it at full size on Facebook. Ensure your image doesn’t look soft before uploading it. You want it to look completely sharp.
On platforms like Photoshop, you can save for web. This will compress the quality, so it will load faster on a web page. Ensure you have selected the image to compress to JPEG at 70% quality. You don’t want to go any lower than this. Make sure you’ve sharpened your image before doing this, so it can make up for any sharpness lost.
Whatever you do, your image will never be completely perfect. It will lose quality in one way or another. However, the point here is to minimise the risk of your images losing too much in quality. As long as your images appear as sharp as they can, and aren’t blurry or pixelated. They’ll never be print worthy from Facebook, but they can still look powerful.


