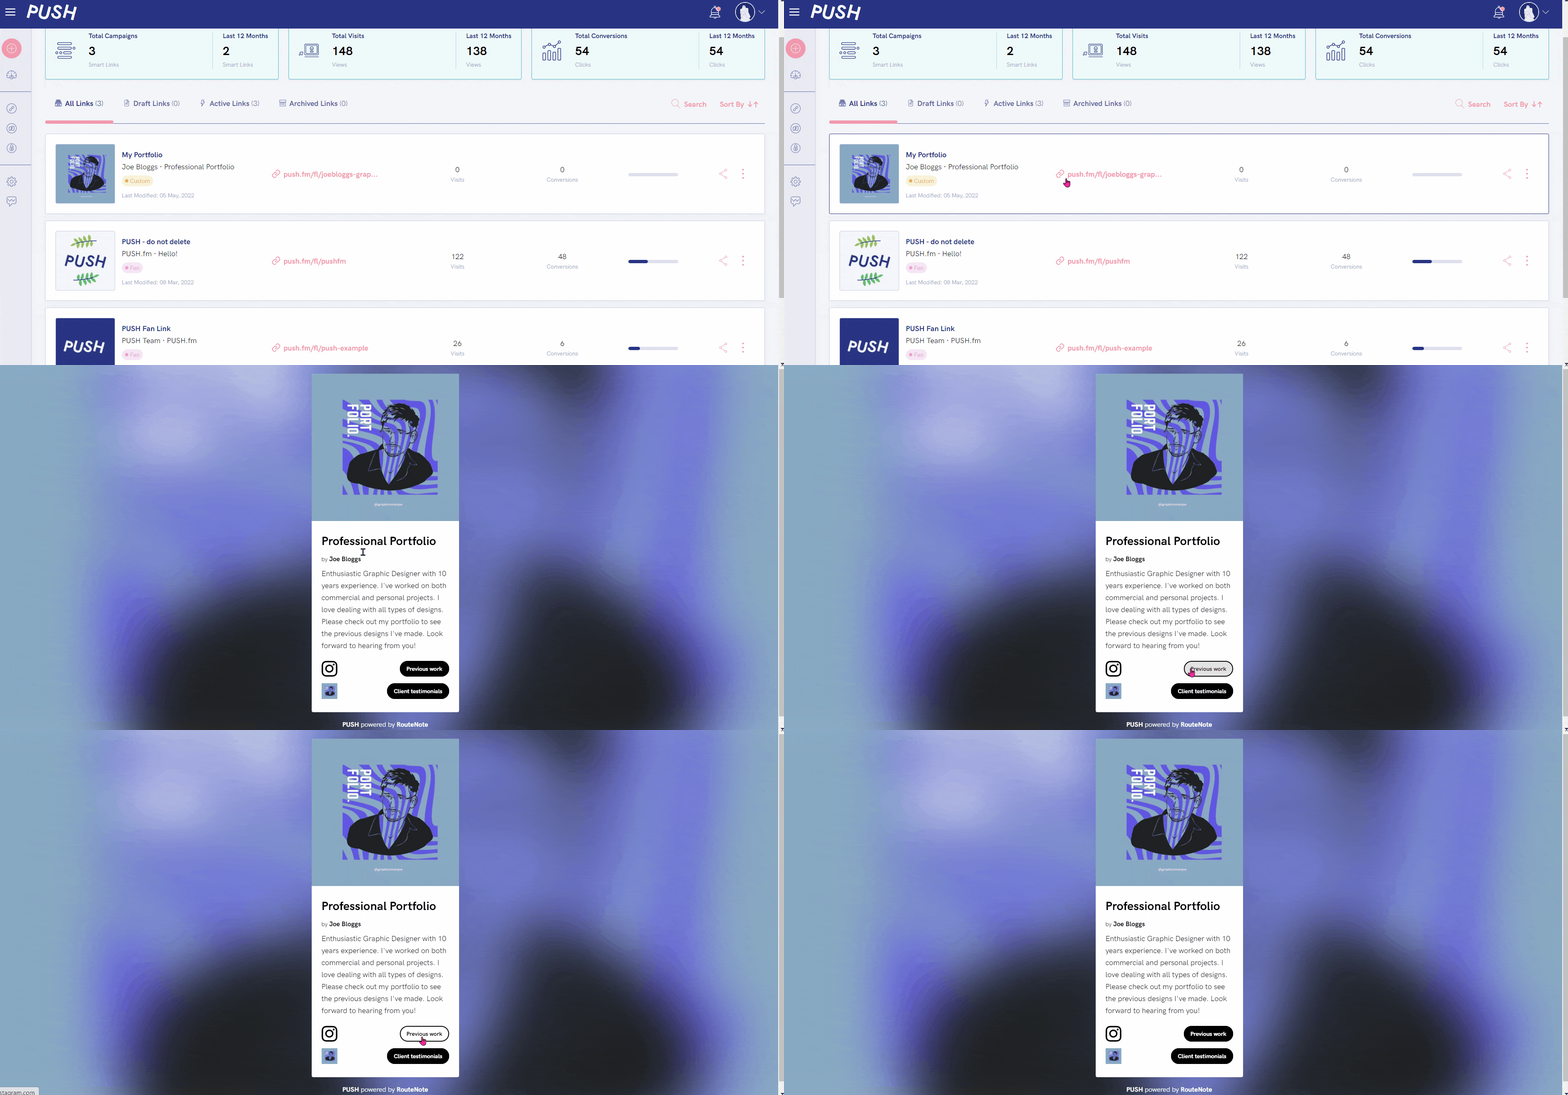
We have multiple Smart Link templates you can access for free. However, if your links don’t fit into one of these categories then you can create your own. You’ll have a completely blank canvas to work with. Mold your URL into something that’s perfect for you.
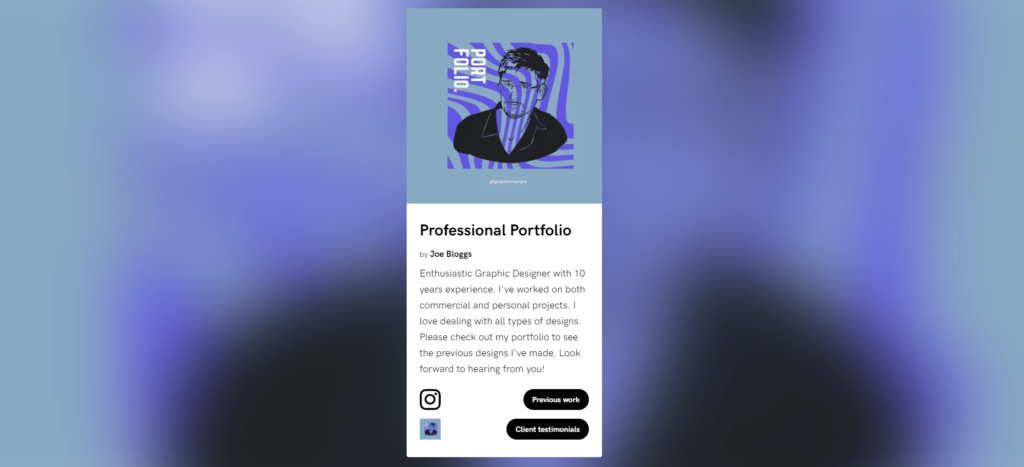
When you think of Custom Links, it could be confusing what comes under this category. The simple answer is anything! If our other templates don’t fit in with what you’re looking for, then our Custom Links certainly will. You could use them to create yourself a CV. Or perhaps you want to make a portfolio, containing your social media links and also a link to your website. The Custom Link can be designed in a way to suit you. There’s no requirement to have an image if you’d prefer it without. This is the only link that doesn’t require one.
How do you create a Custom Link with PUSH?
It’s completely free to create any Smart Link through PUSH.fm. All you need to do is sign yourself up, and you’re ready to go. Once you have an account, head to the pink plus symbol in the top-left corner and select Smart Link as the option to create. You’ll then be taken to our Smart Link templates where you can select Custom Link. It’s a completely blank canvas with no set requirements. So, you really can customise it.
Link Details
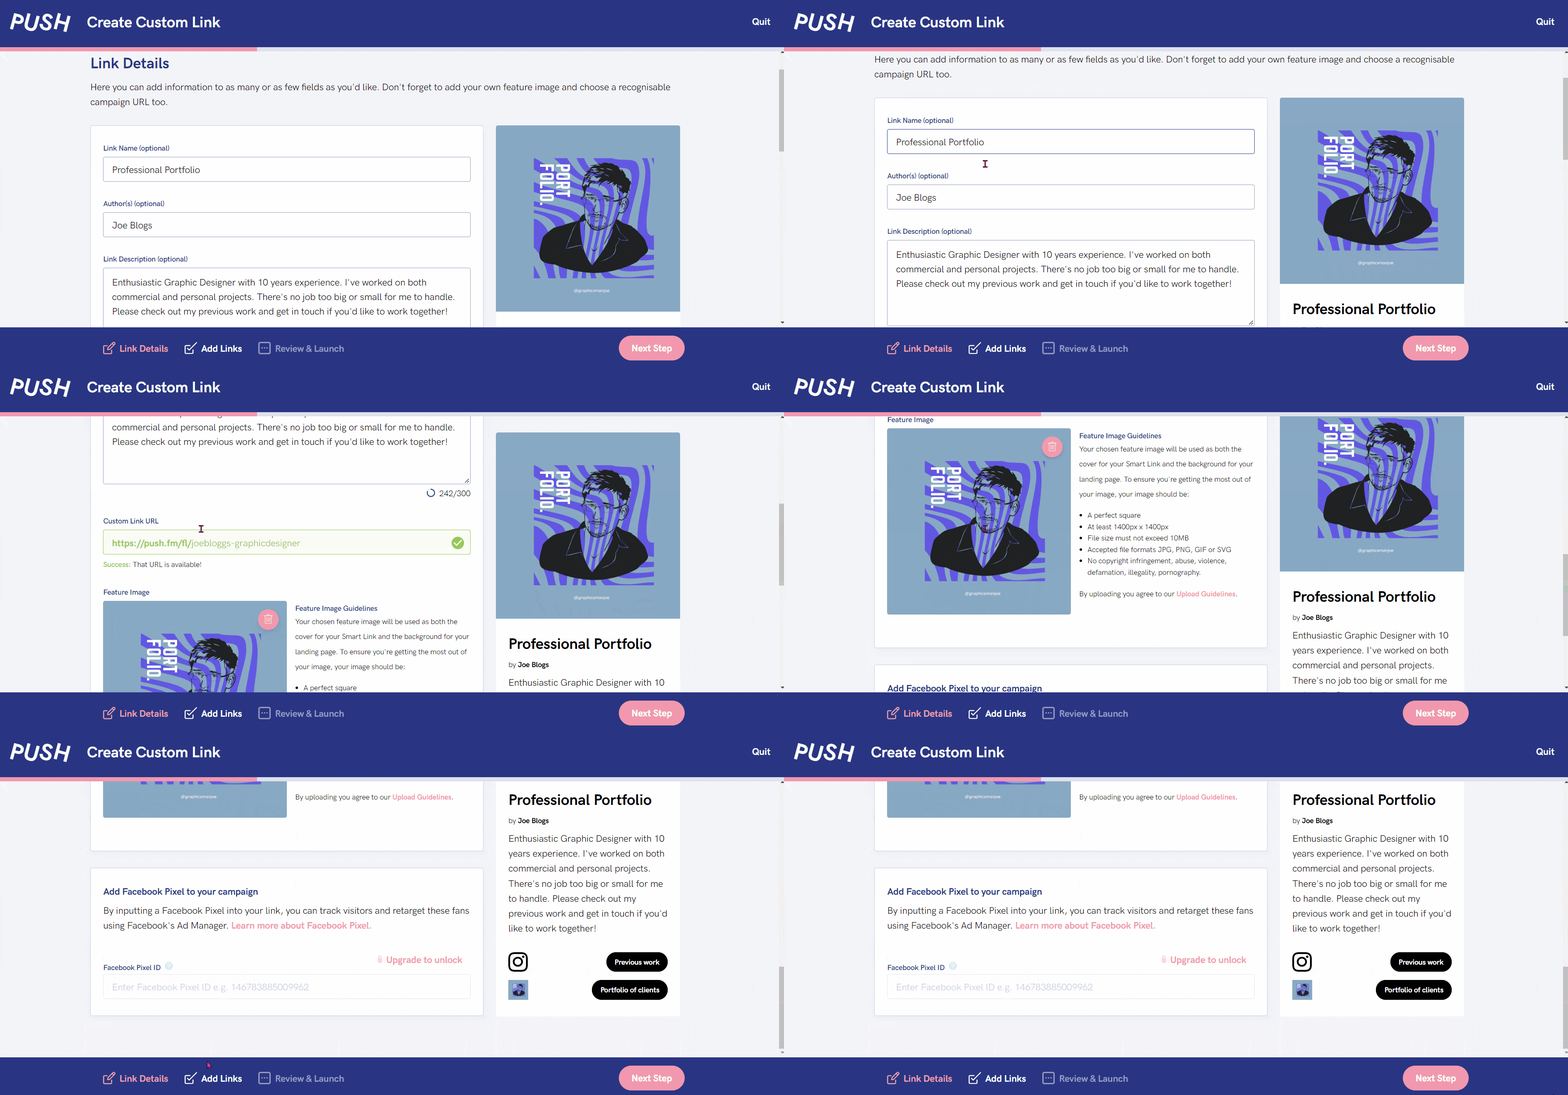
On the first page, you’ll be asked to add in any details. This is where you can give your link a name which anyone clicking on it will be able to see. You also have the option to add in an author name and a description. This is the only link where artwork isn’t a requirement, however you might still want to add it depending on the type of link you’re making. Artwork attracts people to your URL. It makes it stand out and look more interesting.
Within the first page, you’ll be able to customise your URL. Rather than the basic option our system automatically chooses for you, why not make it your own. If you’re creating a portfolio, why not name it that, along with your name? Or, if it’s an app you’re advertising, you could name the URL after that instead. Naming your URL allows people to know exactly what they’re clicking on. After you’ve added in everything and are happy with the preview on the right-hand side, you can move on to the next section.
Add Links
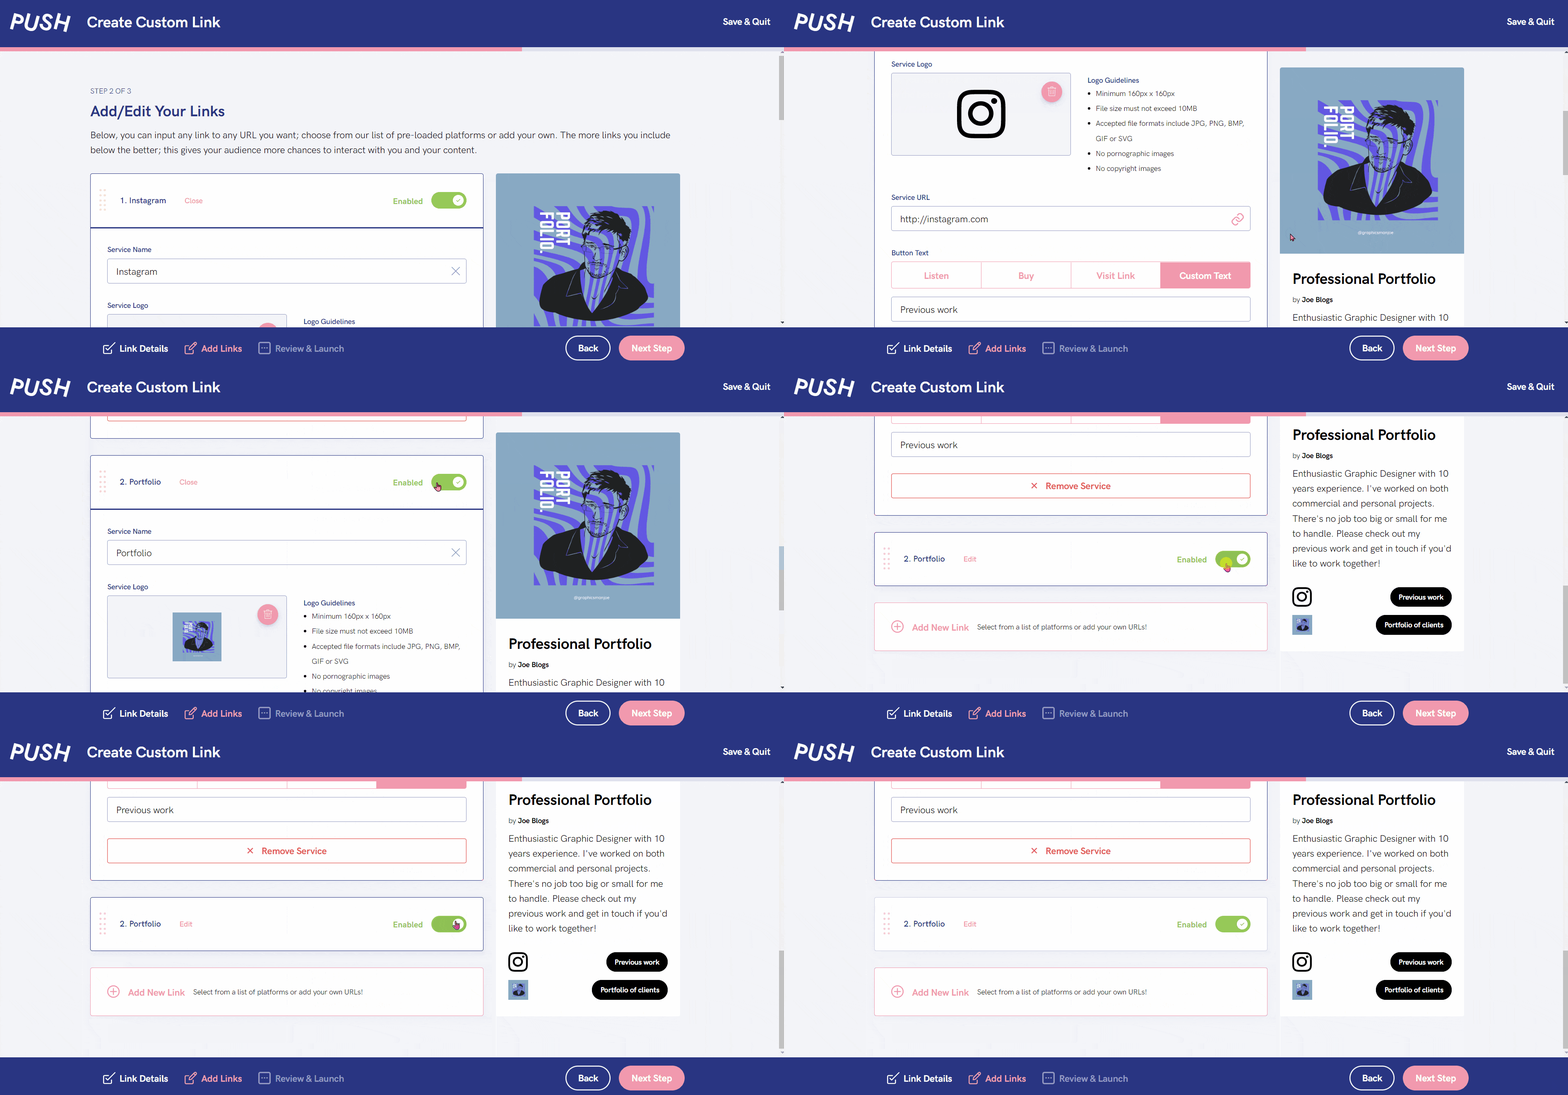
The next page is where you add all of your links. Add as many or as few as you require. There are no limits. We have logos set within our system for websites, stores and social platforms that are common. However, you can change these logos if you’d prefer your own. If you’re a graphic designer for example, you might not want the generic Instagram logo, and instead might want a logo that fits your style. To change your logo, simply click the bin icon on the logo image and then proceed to add your own when prompted.
You can turn services off and on. Keep your eye on the right-hand panel where you’ll see a preview of your link. It might be that you want to change the order to make it run smoother. Or, perhaps you want to remove a service completely because it is no longer needed. You can add in custom stores or websites. So, if you have your own website or a Google link to where your portfolio is stored, this can be included. The idea behind your link is to make it as true to yourself and your branding as possible. This is why we give you so much flexibility.

